This site discusses how I installed a hydraulic top link my Kubota L2501 tractor.
I watched a YouTube video on how to use the box blade, realized I was not using the blade anywhere near its potential.
To effectively utilize the box blade, need to frequently change the box tilt angle, both forward and back and the side up and down. This requires
getting off the seat and readjusting the manual top link and side tilt link. Replacing these manual links with hydraulic cylinders makes it a lot easier to manipulate rear accessories.
Also, when attempting to connect my rear quick connect to implements, I would have to tinker with the top link. Having hydraulic control makes it a lot easier to get everything aligned.
The main challenge is getting hydraulic connections to the back of the tractor. Options include:
- A factory/OEM kit with a dedicated connection to the tractors hydraulic system. I started pricing it out, was over $1500, and the online reviews of the OEM kit indicated it was complicated, some of the provided parts don't fit right, and the provided instructions had errors in them. But it's nice once in place and working - dedicated levers and four connections in the back to drive two cylinders. And the kits have all the parts and connections you need.
- Tie into the existing hydraulic system "PB" and tank valves with a new dual switch. I thought about this, may still do it in the future. Will give enough connections in the back for both the top and tilt hydraulic cylinders. This is more self-engineered system, will need to figure out the fluid flows, tie into the existing hydraulic connections and fabricate hose end mounts.
- Buy a kit that ties into the control lines for the front end loader. $800 for all the parts, simple plug and play, but only have one set of rear hydraulic connections. Uses the loader control to adjust the top link.
I went with the last option - tieing into the loader hydraulic system. Quick and simple. Just gives me the top link, I'll see if I need a tilt cylinder.
Note I don't get any compensation from Amazon, this is just to make it easier to find the parts you need. |
 |
Parts List
- Rear Remote Hydraulic Kit, $550. From Tractor Innovations.
- Top link cylinder, Cat 1, 1", 20-28", $188.45 with shipping. From Agri Supply.
Hydraulic hose connections on cylinder are 3/4"-16 ORB (SAE-8) (ie 1/2" Male O-ring).
- 2 - 36"x3/8" 4800 psi hydraulic hose, 3/8" NPTM x 3/8" NPTM.
- SAE 8M x 3/8" NPTF 90 Swivel.
- 2 - 1" ID nylon hose sleeve for 3/8" hoses.
The last three items came From Surplus Center. Total cost was $45.
|
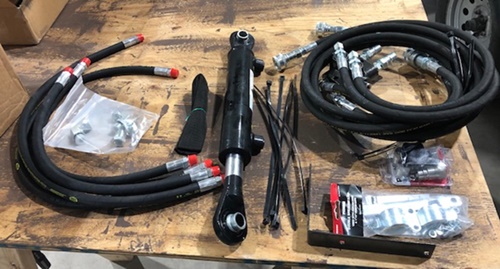
Here is a picture of all the parts needed to add
a dual hydraulic circuit and a hydraulic top link to the back of my tractor. This was made a lot easier by buying a kit, then picking up other needed pieces as specified by the kit supplier.
Parts, from the left:
- Two 24" and two 36" hoses to go from the rear remotes to the hydraulic cylinder. I just used the two 36" hoses.
- Various hydraulic fittings to cross between the hoses and hydraulic quick connects on one end,
and adaptors to connect the 3/8" NPTF hoses to the 8M hydraulic cylinder at the other hose end.
- A 1", 20-28" hydraulic cylinder with top link end connections.
- The kit itself.
|
 |
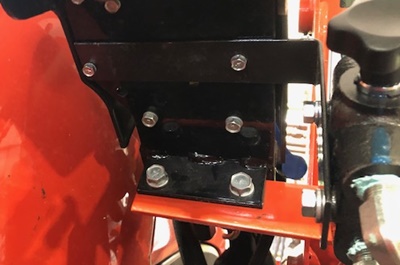
First step is to install a bracket that the switching valve will attach to.
The idea here is to re-route the hydraulic hoses used by the loader to a 2-position valve. When the valve big button is pushed in, the loader control acts like normal. When pulled out, operating the loader lever extends and pulls in the hydraulic link. It's a pretty clever system.
Anyway, the two position switch is called the "switching valve". It needs to be mounted somewhere where hoses can attach to it, and is easy to get to.
This was my first sticking point. The instructions were clear to attach the mounting bracket to the lower tow bolts, but the drilled hole spacing was for the top two bolts. The instructions were so clear and specific, took me a while to convince myself to mount the bracket in the top holes. But I did, and it worked fine. |
 |
| Switching valve mounted. The two quick connects on the top will have |
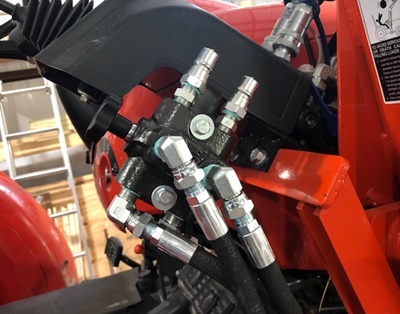 |
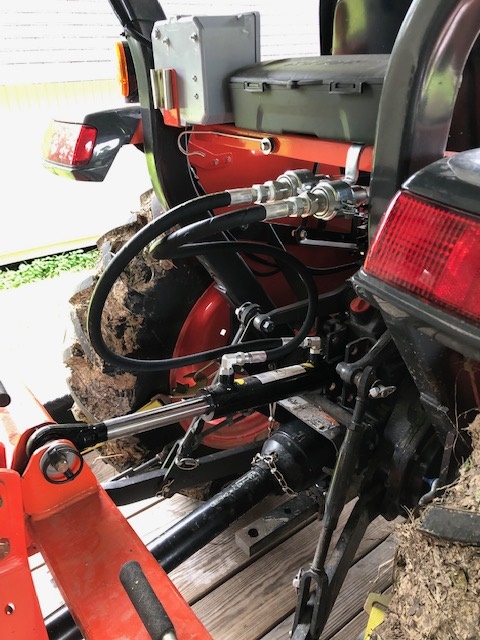
The hydraulic connections need to be mounted somewhere on the back of the tractor. I decided to use one of the toolbox mounting holes and attach to the horizontal metal bar the toolbox is attached to.
While dry fitting,
the rear remote mount interfered with the toolbox, so I had to lower the hydraulic connections. Had to bend the mount to lower the connections, see the pictures.
|
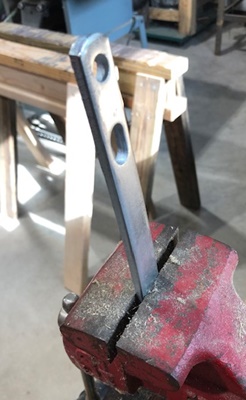
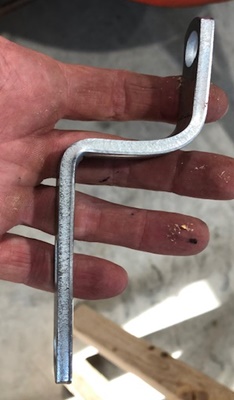
Had to bend the mounting bar, the rear connections got caught on the toolbox.
|
|
 |
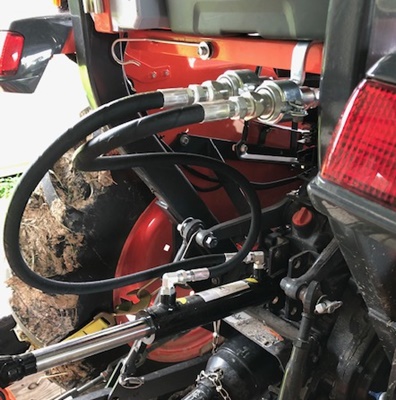
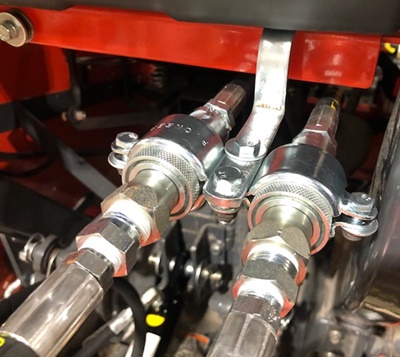
| Here are the rear hydrauli connections. |
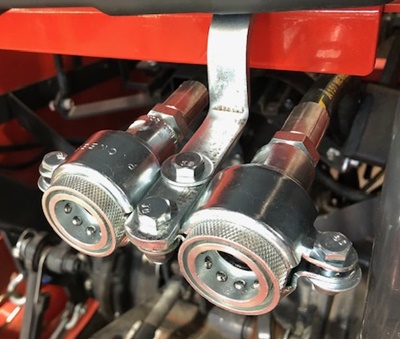 |
| And here are the hoses attached. |
 |
|
 |