Adding a Fan to Cool the Operator on a Tractor
A friend of mine had a fan mounted above the seat on his tractor, I thought it was a great idea to help be more comfortable in the hot Texas summer weather. I was right, the air blowing on me when I'm sweaty really cools me off.
Be sure to start with a canopy. Mine gets a lot of abuse and is bent up. But getting out the sun is a big help. I bought it from the dealer with the tractor, it is aluminum with felt insulation on the bottom. It works really well.
The link above has details on how to install a fan. In general, run positive and negative wires from the battery in the front to a control box mounted behind the seat. A relay in the control box energizes the fuse box when the tractor key switch is on - this prevents accidently running the battery down when the tractor is turned off and you forget and leave the fan running. Wires go up the ROP to the canopy where a 14 inch radiator fan is mounted. |
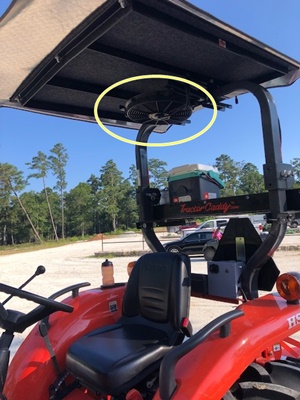
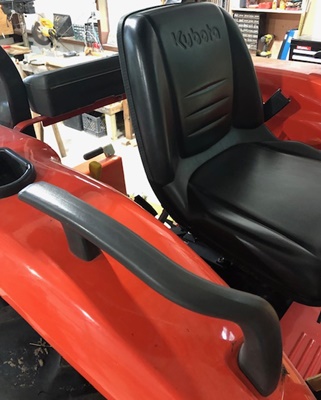
Fan mounted above the seat, works great to help keep cool. |
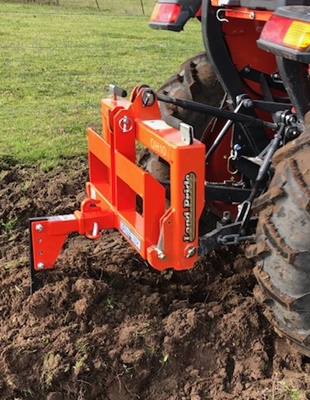
Install a hydraulic top link
I watched a YouTube video on how to use the box blade, realized I was not using the blade anywhere near its potential.
To effectively utilize the box blade, need to frequently change the box tilt angle, both forward and back and the side up and down. This requires
getting off the seat and readjusting the manual top link and side tilt link. Replacing these manual links with hydraulic cylinders makes it a lot easier to manipulate rear accessories.
The main challenge is getting hydraulic connections to the back of the tractor. Options include:
- A factory/OEM kit with a dedicated connection to the tractors hydraulic system. I started pricing it out, was over $1500, and the online reviews of the OEM kit indicated it was complicated, some of the provided parts don't fit right, and the provided instructions had errors in them. But it's nice once in place and working - dedicated levers and four connections in the back to drive two cylinders. And the kits have all the parts and connections you need.
- Tie into the existing hydraulic system "PB" and tank valves with a new dual switch. I thought about this, may still do it in the future. Will give enough connections in the back for both the top and tilt hydraulic cylinders. This is more self-engineered system, will need to figure out the fluid flows, tie into the existing hydraulic connections and fabricate hose end mounts.
- Buy a kit that ties into the control lines for the front end loader. $800 for all the parts, simple plug and play, but only have one set of rear hydraulic connections. Uses the loader control to adjust the top link.
I went with the last option - tieing into the loader hydraulic system using a kit supplied by Tractor Innovations. Just gives me the top link, I'll see if I need a tilt cylinder. Check out the link above for details on how I installed it, pretty simple. |
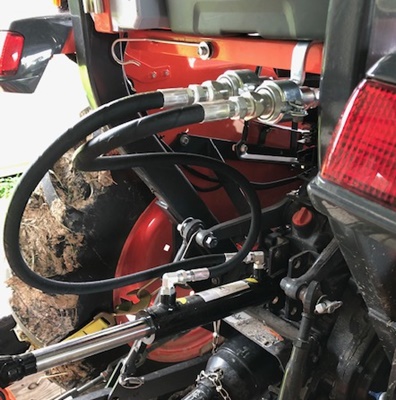
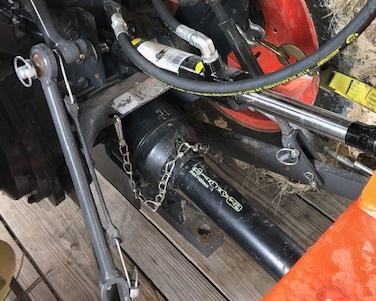
Hydraulic top link, controlled with the loader lever .
|
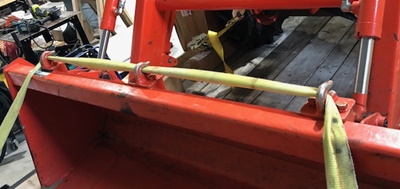
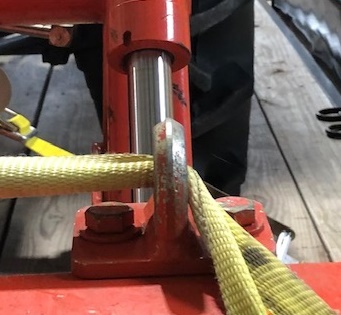
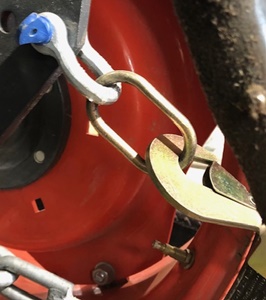
Hooks on bucket
A very helpful addition - the ability to connect a chain directly to a grab hook(s) on the tractor bucket. Much safer than hooking the bucket lip with a grab or slip hook, or wrapping a chain around the bucket.
I went with three hooks - one in the middle and two each aligned with the loader hydraulic pistons. You need to be careful you don't bend the loader frame, so I use the center hook when picking up something with one chain. When using two chains, I use the hooks aligned with the hydraulic cylinders. If I use one of the side hooks, I'm careful to limit the weight.
Bought the hooks from Bolt On Hooks. This is one of those things you think "I can do it cheaper", but the welds are high quality, fit perfect, you are supporting a guy working from his home shop, and the kits are reasonably priced. He was responsive to my email questions, highly recommended.
|
 |
Quick Connect
A quick connect is a very useful
addition. It attaches to the top link and lower link arms. It's relatively light (compared to a rotary cutter!) and fairly easy to connect to the top link and the link arms.
Once you have it on, the three hooks on the quick connect align with implements. So you back up to your box blade or mower, lower the quick connect, slowly back up to the implement, use your hydraulic top link to align the top hook, pick up the implement and go. It's that easy - no more straining to align the link arms with your implement.
This really is a game changer - swapping rear implements is very easy to do by yourself.
The only headache I've found is some implements don't align with the hooks on the quick connect,
even though there is supposed to be some sort of spacing "standard". I just bought a hay spear from Tractor Supply - of course it does not fit. Kind of like buying anything from Harbor Freight - maybe I'll learn some day . . . I'll have to cut off a couple of tabs and re-weld them in the correct place. Supposedly there is a standard, but does not seem to be closly adhered to. |
Quick connect makes it much easier to swap implements on the back.
This is a 2" reciever with a subsoiler inserted.

Hooking up to my boxblade.
This pictures has the hydraulic top link, makes it easier to align the hooks. |
Tractor tiedowns
Tieing the tractor to a trailer is a bit of an art. I tried to understand the minimum tie down legal requirements so if I get pulled over,
hopefully won't get a ticket. And I've seen a tractor in the ditch that came off at trailer. That will send you to the trailer store in a hurry to buy new chains and more tie down straps!
So best I can figure out, if the load is less than 10,000 pounds, you need one strap on the front of the tractor, one on the back,
and a strap over any implements on the front and back. I like the idea of redundacy, so I run two straps to either side of the front
radiator guard, and two straps to rings I added to the back of the tractor (see pictures). This creates four straps pulling in four
directions. Then I have a strap over the bucket and another strap over whatever I have on the back. Total of six straps, each rated
for 10,000 pounds.
I tried using chains, went back to straps. Chains certainly feel really robust, but they are heavy and a little tricly to use. As I'm getting older and watching my back more carefully, decided to go back to lighter straps. They are 2" wide and rated for 10,000 pounds, and I replace them when they look damaged.
Note I use hooks with safety clips so it can't accidently pop off. I junked a motorcycle years ago when I put it on a trailer, compressed the handlebars and hooked them with a strap. Then the bike unhooked and went cartwheeling down the road when I hit a bump. Was a sick feeling to
look in the rear view mirror and see the mirrors and lights go flying off that brand new motorcycle. |
Rear tie point. Shackle with a ring added to back of tractor, allowing tie down strap to be clipped in.
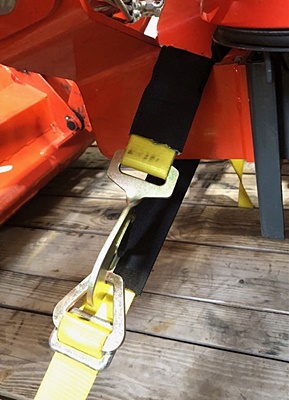
On the front, I use this strap around the brush guard. Note the protective anti-abrasion guard. |
Tool Basket on the ROP
I'm dissapointed at how inadequate the tool carrying capacity of a tractor is. So I installed a "Tractor Caddy" on the ROP. Another great addition,
I carry chains, chain saw, lobbers, ice chest, hammer, first aide kit, fire extinguisher, etc etc.
Bought the "Tractor Caddy" from Tractor Mike.
Another little guy, nice to support them, great service, caddy showed up pretty quickly. Reasonably priced. |
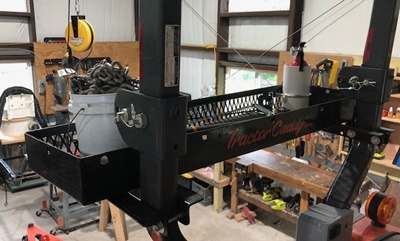
Tractor Caddy mounted on the ROP. Super helpful for carrying tools, but does
obstruct rear vision a bit.
|
Handle on the right side
The tractor did not come with a handle on the right side, but there were holes and small recesses for a handle to go into. The dealer had one,
cost was around $80. Well worth it, I have to hang on to a handle when bouncing around. Two bolts, very easy and quick to install.
|
Handle on the right side. |
Safety Note regarding PTO drive shafts
The PTO drive shaft safety cover is not supposed to rotate . . .
Something I'm disappointed about in regard to tractor safety is instructions on how to operate and maintain the protective covering around a PTO shaft. The consequence of getting tangled up in a PTO drive shaft rotating at high speed is too gruesome to even contemplate. PTO shaft injuries are the second most common source of farm accidents (after tractor roll overs, 350 fatalities/year).
Note I did not know any of this - a friend had to tell me about it.
There should be a chain at each end of the PTO shaft cover. These are clipped to the tractor and the gearbox. This keeps the PTO shaft protective cover from spinning with the PTO shaft. The chain length should be long enough to reach a clip attachment point, but not wrap around the shaft - in case the chain comes loose you don't want it whipping around, and there is a weak point on the plastic cover that needs to be able to break. Reading through the operating manual for my rotary mower, it is silent regarding the need to connect the chains. Actually my mower did not come with any chains, had to buy them myself.
I borrowed a post hole digger from a neighbor, had to rebuild the protective cover. It was stuck to the PTO shaft and did not protect the operator.
Be sure to take PTO shaft safety seriously. |
Chain on PTO shaft safety cover keeps it from rotating. Getting wrapped around it would be a very bad day. |
